Saturday, May 23, 2015

How-To: Ghetto Flo

Executive summary on Home Gown Flo lighting, A.K.A. Ghetto Flos:


  • The color quality is a result of the tubes only. ( The technology that makes the light is in the tube. )

  • Modern high frequency electronic ballasts (which are very common now) do not flicker.

  • There are many good choices of off-the-shelf tubes with the **CCI and a high *CRI.

  • It is possible to "over-drive" off-the-shelf tubes with off-the-shelf ballasts to get higher output.

  • Compact Fluorescent bulbs are a very promising technology for Ghetto-Flo lighting. They use electronic ballasts and have high output for their size and are available in the correct **CCI and CRI.


*CRI - Color Rendition Index. How continuous or "true" the spectrum from a light is on a scale of 1-100. 100 is perfect. Lights with a CRI over 85 are suitable for film and video. A CRI of 90 or better is great, but the light output of extremely high CRI lights is often lower than lights in the area of 85 CRI. Under 80 CRI is not good for film and video.

**CCI - Correlated Color Index A.K.A. "Color Temperature" - The theoretical black body color value of the light.

A quick survey of the available off-the-shelf hardware reveals that good home-brew flo lights can be built for significantly less than the cost of name brand flo-lights. (Anywhere from 1/20th the price to 1/6th the price, depending on various factors)

Intro:

The problem:
I needed new lights to replace my old photo light setup. The new lights had to meet certain requirements.

1. Must work for both still photography and film/HD/Video
2. Capable of producing soft light without taking up too much space.
3. Daylight balanced so they can be used in combination with natural light
4. As inexpensive as possible.

Kino-Flo (TM) and various other name brand manufacturers produce movie lights based on fluorescent tubes rather than tungsten or HMI bulbs. As you might expect, they emit a soft wrappy light similar to a soft box of the same size. Kino-Flo Tubes are available color balanced at 5500k (Daylight/HMI), 3200k (Pro-Tungsten) and 2800k (Consumer Tungsten). Kino tubes are engineered to have a good Color Rendition Index (high spectral continuity) and lack the typical green/blue spike many consumer and industrial fluorescent tubes have. Beyond the precision tubes, another "special" thing about Kino-Flos is the ballast. Kino ballasts are engineered to be flicker-free when shooting at normal motion picture frame rates.

For soft light, Kino-Flos kick are one of the finest solutions available. They have high output for the amount of power they use (nearly three times as efficient as Tungsten lights) and they hardly generate any heat. The problem is Kino-Flos cost too much. Even the tubes cost too much. ($20 each)

Would it be possible to build something equal in caliber for less money?

Theory:

I'd read that others had been experimenting with some of the (new-ish to the consumer market) electronic ballasts. In theory, almost any modern electronic ballast should be stable enough to be flicker free at regular film frame rates. While doing my research I noticed that there is now a commodity consumer market for "Continuous Spectrum" fluorescent tubes as well. In combination, these two consumer grade off-the-shelf technologies should be capable of producing a quite serviceable "Poor-Mans Flo" light. The name that seems to have caught on for this type of lighting instrument is Ghetto-Flo. From here forward I'll refer to them as either Ghetto-Flos, G-Flos or home-brew.

Testing Begins:

Though I've read a few accounts of peoples success building and using Ghetto-Flos, the accounts always seemed a little thin on details. Not a big problem really. But it did take me a while to gather all the information I needed. I tend to not really believe anything until I see it myself so I decided to do a series of tests to figure out my own "recipe". Considering that the bulk of the "technology" in a flo-light resides in the tube, the thing I was most interested in learning from my tests was what the quality of the light from various commercially available tubes looked like. Second, I was interested in the stability of the ballasts when shooting various shutter speeds/frame rates. Last but not least, I was interested in the total light output (LUX) from the ballast / tube combination.

While I attempted to be as methodical as possible my testing method is not highly scientific by any means. I do not have a color temperature meter or the equipment to accurately verify manufacturers published CRI, CCI or relative output of the various tubes I tested so I came up with a simple method to at least approximate the quality of each tube. I shoot a test scene with my digital camera in "RAW" and then color correct it for white balance in Photoshop RAW loader to determine it's approximate white point. I then color correct the same image to the stock "Daylight" and "Tungsten" white points to see, visually, how much the light color deviates from that white point. I do both tungsten and daylight because even though my current focus is daylight balanced tubes I may eventually test tungsten color balanced tubes. For the relative light output, I just use the exposure information from the EXIF data of the image which tells me if the light output is significantly different from one setup to another.

Here are the results from the tubes I've tested so far:


Recipes:

There are several recipes for home-brew flo lights. Here are a few I've investigated.
1. Use and off-the-shelf lamp housing with an electronic ballast + the correct flo tubes
2. Fabricate a lamp housing or modify one and use off-the-shelf electronic ballast (popular when over driving tubes)
3. Compact Fluorescent "bulbs" with reflectors and/or "China Balls"

Recipe #1 ingredients:
2 x GE Chroma 50 T12 48" [5000k, 90 CRI, 2200 LUX] ($3.50)
American Fluorescent Shop Lamp ($34)
Baby Plate ($4 used)
4 x #8 Screws ($?)

Total about $45 + TAX

The tubes I ultimately settled on where the GE Chroma 50 T12 48". They are inexpensive at only $3.50 each and available at Lowes and other hardware stores. Their CCI is 5000k with a CRI of 90 outputting 2200 LUX at stock power. The lamp housings I used were American Fluorescent electronic ballast shop lamps. They were the more expensive housings as far as shop lamps go, but I found them more attractive and ruggedly built than the really cheap lamps. It seemed like the extra few bucks were worth it. To attach the lamps to the C-Stand I screwed a "Baby Plate" to the top of each with short #8 sheet metal screws.

Recipe #2 ingredients:
4 x GE Chroma 50 T12 48" [5000k, 90 CRI, 2200 LUX] ($3.50)
Coroplast 1cm thickness
Aquarium VHO 4 lamp Electronic Ballast Kit + "German End Caps" (lamp plugs) And wiring ($160)
Velcro
Baby Plate ($4 used)
Clear Plastic Packing tape
Reflective Mylar Space Blanket ( $1.99)
3M "Super 77" Spray Glue

This recipe can be completed more economically by using multiple standard 4 lamp ballasts and wiring them to only 2 or even 1 lamp each. (Achieving an over-drive effect) Suitable electronic ballasts can be purchased for about 10 bucks each. The advantage of this scheme is that it allows running more or less lamps as required... A sort of poor-mans dimming. The "German End Caps" and handy because of the way they grip the tube, simplifying the mounting to the Coroplast with Velcro. Velcro is used to make tube removal easy. It's possible to remove the tubes and use them without the body/reflector.

Recipe 3:

Of these three recipes, the Compact Fluorescent is by far the easiest and most exciting. Since CFLs are self ballasted and all use electronic ballasts, 95% of you work is done by simply selecting the "bulb". CFLs also have incredibly high output for their size which is good if you are trying to get a "harder" light source. They'll never look like the sun or a Fresnel lamp, but you can at least get SOME shadows with a CFL in Par reflector. The only down side is that the best CFLs available seem to have a max of 85 CRI. It isn't a terrible CRI... but it is the minimum you should consider for film and video.

Research Continues:
Worth further investigation are the newer more efficient T8 and T5 tubes. In the end I didn't go with these because I was not able to find a local outlet for tubes of the correct specifications for a reasonable price. I went with T12s because they are common and inexpensive.

I've only just scratched the surface with over driving. It is an area that shows much promise.

Judging by their output vs. size, and how hot they seem to get I assume most CFLs MUST be "over driven" compared to regular tubes. Many of the commercial kits seem to use CFLs. I haven't even gotten close to exhausting the possibilities with Compact Fluorescents. There is currently a staggering selection of CFLs available with the correct CCI and CRI. It is worth further investigation.

Saturday, May 29, 2010

Canon Cinema

Everyone seems to be in love the new HD shooting Canon SLRs (5D, 7D and Rebel 2ti). I have a 7D myself, and it's the coolest toy I've had in ages.

But depending on the "mission" it's not always really the best choice of video camera. Other times, the cameras unique strengths make it and ideal choice. Here are some of the cameras strengths

1. Small and lightweight
2. Incredible choice of lenses
3. Excellent stills shooting capability

It also has some major shortcomings:

1. Aliasing due to binning or skipping photosites on read-out of the sensor
2. Rolling shutter
3. Highly compressed h.264, 4:2:0 sub-sampled video
4. Poor ergonomics for video shooting
5. Poor on-board sound, which essentially necessitates dual system operation for anything requiring decent sound.

Each shortcoming is minor in itself, but they do add up. Third party vendors like Zacuto and Redrock Micro sell accessories to address some of the ergonomic short comings of camera. Of course, once you pimp the camera out with all the accessories, it's no longer small and light. And the technical issues are still a problem. The accessories do nothing to solve the the aliasing or rolling shutter.


Still, the success of these cameras have gotten Canons attention and now Canon seem to be listening to the concerns of video shooters. Thier recent addition of 23.98fps as a feature on the 5D is evidence of that. If Canon were smart, they would really go after this market because they could OWN it in two years with just a few careful moves:

1. Make a large sensor video/cinema camera similar to the Red Scarlet that takes Canon EOS lenses
2. Improve the ergonomics of the Canon EOS lenses to make them more "cinema like" . This could easily be achieved with the current line of lenses with clever electronic control of the mechanism. Third parties are already doing it on the Red One. But Canon knows their lenses better than anyone, so have an advantaged position in really making it work well.
3. Don't cheap-out on the output options. Consider lightly compressed I-Frame only 10 bit 4:4:4 or RAW for video recording, or at the very least, allow uncompressed 4:4:4 video or packed RAW to be sent out the SDI of HDMI port. HDMI 1.3 supports some incredible data rates, so in some ways it's more versatile than SDI.

and last of all...

4. Keep the price of the system in the "prosumer" range.

That's it. The other details would work themselves out in the planning of the new system. But in my mind, the important thing is to keep it compatible with the EOS lenses to gain the economy of scale that provides. Perhaps they could also create a new line of "super premium" lenses that are above even the "L" series. They could be "super speeds" marked in T-Stops and have improved cinema style ergonomics., etc. But I think they should still have electronic focus features, and be provided in EOS mounts so still shooters could still use them if they like. (That would help keep the volume up so they are still commodity lenses, like the L series)

Sunday, December 27, 2009

gigabit NAS from a Walmart eMachine

One of my big projects/hobbies at the moment is building a digital archive of my all my families photos and videos. We are also digitizing all of my late father's artwork we can track down. (My dad was a very prolific artist and writer... we still haven't even cataloged his entire body of work!) The scans of all the old pre-digital slides, negatives and prints are being done by Scan Cafe. So far I've gotten on batch of scans back from them and I'm very happy with the results.

For the "I.T." side of my project, I'm using a multi-tiered system to maintain the stability of the data:
1. Master server with RAID-6 storage (also runs Digital Asset Management System)
2. Back up server with simple rsync mirror of the master server
3. Off-site Internet based "Cloud" backups.
4. DVD backups of high-value metadata and configs

The Backup Server does double duty and acts as the "Cloud Pusher" server.

At present I'm building the Backup Server / Cloud Pusher. Because none of the inexpensive cloud back up providers (i.e. Mozy / Backblaze) support Linux yet, the Cloud Pusher needs to run Windows. Windows is not my favorite OS. However, in this case it's a necessary evil.

The Cloud Pusher will be running 24/7, so low power utilization is also a requirement.

To address all the requirements I finally settled on using a refurbished Walmart special, the
eMachines EL1300G-01w slim desktop. Compared to good contemporary hardware, it's a complete embarrassment...totally low-spec and slow. But for my purposes it is nearly perfect: It's inexpensive, comes with Windows pre-installed, and is fairly power efficient due to it's CPU and other components. (AMD Athlon 2650e / nVidia GeForce 6150se / nForce 430 / 2Gigs RAM ) Seriously, for what it cost, including the Windows License, it's a very good deal. ($180) I would not have been able to even build a functional computer sans OS for what this refurbished eMachine cost. Mass market hardware is so cheap these days!

However, the included 160 GB hard drive was totally inadequate for this project. I replaced it with a 2TB Hitachi.

To migrate to the new 2 TB drive, but keep the OEM install of Windows Vista, I used a fantastic live Linux distro called Parted Magic. Parted Magic is a Swiss Army Knife for disk partitioning, cloning, backup and system rescue. It also has a ton of tools for checking hard drives, system hardware, and doing other useful stuff. To be honest, due to recent versions graphical improvements, it's even become my favorite "Micro-Distro" / "Thumb Drive Distro". Parted Magic has everything you need to boot a machine and get a web browser running. ( When not at work, that's all I typically need anyway.)

Before I even got started with the migration to the new drive, the first thing I did was go though the OEM Windows install and remove the Bloat-Ware and "Craplets" that every OEM seems hell bent on pre-installing. Vista is notorious for it's sluggishness, but with tweaks it can be pretty usable. I went though and optimized performance by turning off un-used services, flashy graphics, etc. Honestly, those two exercises were the biggest use of my time. (And one of the reasons why I so detest Windows). I could have easily set up Linux in a FRACTION of the time required to whip this OEM Windows install into shape. Walmart and eMachines put so much crap on the machine is makes it almost un-usable. They should be ashamed. The Windows license was "free" with the computer, so I guess I had to "pay" for it somehow. But I can see why people have such low opinions of these cheap computers. Windows and the junk the OEMS install on them make the computers seem like complete junk. (When in truth, the hardware is actually pretty powerful)

Once the machine was all tuned up I was ready to start the migration. This is where things got a bit tricky. The EL1300G only has two SATA ports and both are used. (One for the DVD-RW and the other for the hard drive) I COULD have used a USB bridge board to hook the new hard drive up to the computer, but then performance would suffer. I would have also lost access to a lot of the low level control of the drive. What I did was unplug the DVD-RW and use the SATA port it was taking to plug in the new drive. Here is a photo of the computer with the case open and both hard drives plugged in:
[PHOTO]

To boot Parted Magic I used a USB Thumb Drive rather than a CD. At this point I have to comment on how awesome bootable thumb drives are. Not only are they relatively fast compared to an optical drive, they are so convenient! In this case, I could copy stuff from hard drive to hard drive over SATA, for best performance, even though I only had two SATA ports. (Meaning I could not boot from a device on either SATA port) I used Clonezilla (in Parted Magic) to clone the old hard drive from the old 160 gig to a the new 2 TB drive.

After the cloning was done, I re-partitioned the drive using GParted to re-claim the area that was occupied by the OEM "restore" partition, and reserved some new space for my own "restore" partition, which in this case is an disk image I created with PartImage. My new restore partition is also a reserved space for a potential future Linux install. Basically, the entire new setup has a little bit of "future proofing" built-in to protect for the case of a Linux dual boot setup. I haven't bothered doing the install yet, since this machine doesn't need Linux yet. But all the partitions required are in place.

So I guess the gist of this post: Love-fest for Cheap Hardware. Love-fest for
Parted Magic. Check out the tool. It's super useful and a great example of how Free Software is completely superior to commercial software. Here is my finished NAS / Backup Server / Cloud Pusher

Tuesday, July 17, 2007

Long live Duchess.

The gardeners came this morning and when I went to check the coop on my way out to work the chunks of skin, feathers and the head were gone form the lawn. I'm guessing they mowed over the feathers and they got sucked up with the grass. They either mowed over the head and it was sucked up also or they cleared it. Anyway, there is much less evidence of what happened as of this morning. I'm glad I did the rounds last night because it would have been harder to figure out what happened otherwise. All that was left today was few feathers.

My concern now is that whatever hit Duchess now knows a good place to get chicken easily. It will be back at some point for seconds. Even if I DO lock the chickens up at night I'm going to have to make sure the coop is predator proof because whatever it was that got them is probably going to be more persistent next time. (Especially if it really likes chicken)

The sad life of a prey animal... At most it's only been a few days since she died and already there is almost no evidence that she ever even existed. Well, I mean, I have the chicks at least, so she lives on though them. But her body is pretty much totally gone.

I'll be much more careful with her offspring.

Monday, July 16, 2007

Duchess is dead

I was away for four days at a family reunion. A friend of mine was taking care of my chickens but since she could only come by once a day she couldn't open and close my chicken coop (The "Chicken Breasts 2000") I decided it would be OK to just leave the coop open the whole time I was gone. I usually close it up at night to keep the chickens safe from nocturnal predators. Chickens are very vulnerable at night because they really don't put up much of a fight when they are sleepy. It wasn't the smartest move, but I felt it would be better than leaving them cooped up, especially considering how hot it is right now.

Enough back story... I got back home today to discover my loss. After settling in I headed back to the CB-2000 and check on the hens and lock up the coop. Duchess was nowhere to be found. But I noticed some feathers scattered about. I widened my circle to include the lawn in the back yard only to find more feathers, chunks of flesh attached to feathers, and a chicken head. The chicken head was pretty beat up, so it's not like I can give a positive "ID", but I'm pretty certain it is (was?) Duchess.

Right now I'm thinking it was either a skunk or a raccoon that did her in. But you never know, a dog might have gotten in there during the day and gotten her. That's never happened before so I'm really leaning toward skunk or raccoon... something nocturnal. Considering that she seems to have been consumed almost entirely, I really doubt it was a domestic animal. ( Who knows, it might have even been a hard up chupacabra)

I'm pretty bummed about this. I would have been a little upset if one of the new hens was the one that got it but for Duchess to be the one to buy the farm is a real upset. IMHO she really deserved to live after giving me so many chicks and putting up with the two roosters for so long. The thing that really has me scratching my head is why that skunk or raccoon didn't ever eat any of the eggs in the past. Duchess was laying eggs in the bushes at one point for nearly a month before I noticed and as far as I could tell no pests ever bothered to eat any. Not even rats.

It was stupid of me to leave the hens unlocked at night. I probably should have moved them into the garage while I was away. Now I know there is SOMETHING that will attack and kill them at night so I will be more careful in the future. I just wish it didn't have to be duchess that was the first to go.

R.I.P. Duchess You will be missed.

Thursday, May 17, 2007

Film Making

Lately I've been involved in a group at work that makes movies. We make little movies as practice for making big movies.

My little brother is also an aspiring film maker. He asekd me for some advice about doing a full feature. I thought the info might be interesting to others so I'm re-posting a more generic version of it here:

Even though I haven't ever done a REAL (i.e. money making ) feature project my self (Uh, outside of my job, but I'm just rank and file there) I have a few pieces of advice from my exposure so far.

There are two important factors: Story and Performance. Everything else serves those things, no matter how artistic it is ( i.e., lighting, cinematorgraphy, etc.) The story is what people walk away with but it's the performance that keeps them engaged moment to moment while they are watching the film. I'm sure you can imagine how a bad performance could kill the whole project.

Your are on the right track by wanting non-suck talent. The actors will bring a HUGE amount to the project. Be very picky about your casting and make sure you audition everyone. If they don't have a good resume and can't do the audition than forget it. You'll never get a good film out of them. (There are plenty of trained actors to work with so why work with amateurs?) Make sure that you are a non-suck director as well! You might want to take some acting workshops yourself, so you can learn how to spot "false" performances and get the best out of your actors. There are several books out there on directing. I'm reading one now called "Directing Actors" which is quite good.

In that same vein, you don't want your script to suck either. I'm not sure who's doing the writing for you, but make sure the script is solid before you start shooting. The right script with the right take can definitely turn heads. Napoleon Dynamite may not have made big bucks at the theater, but it definitely put those guys on the map. Much of that script seemed like it was simply accommodating the resources they had. But it did it in such a fantastic way! Don't forget the local resource you have when coming up with your script.

As for getting crew, I suggest you try to put non-students in the key positions on your crew. Get as experienced a DP/Cinematographer as possible. Same for the sound guy. Everyone else on the crew can be more green. They are basically just moving stuff around after all. But they'll still be learning by watching the pros work, and you film will be much better for it!

From a technical stand point, sound quality is more important that picture quality. Give sound proper attention. Bad sound will drive the audience crazy while poor picture will only bother them a little. "Bad" picture can sometimes even be justified as a stylistic choice... for example, skip bleach, cross processing, or shooting Super 8 will definitely have a detrimental effect on the image "quality" but given the correct stylistic intent the loss of "quality" might actually be desirable! Bad sound is just, bad sound. Make sure you have a good sound recorder and mikes with someone who knows what they are doing running them.

You can't over-prepare. Scout out locations and have a solid game plan at the very least. I personally would board everything out. I'd probably even do a 3D animatic to figure out what shots you can actually get. (Depending on the lenses you have, It might be physically impossible to place the camera for certain shots in a small room) If you have all your shots planned out in advance, you also wont have to shoot too much "coverage", which will save a bunch of time and tape/film. (The side effect is that it might make editing a lot easier as well) If you want to do any dolly shots, I would definitely do an animatic because they can be a huge time suck. Maybe you don't need that technocrane shot? The animatic will tell you in advance for a lot cheaper! The animatic could be just you working. Once you have your cinematographer, you can bring him in on it also. If you get a cinematographer who says he doesn't like to plan like that I wouldn't trust him. He should know there is room for improvisation and improvement on the set and should feel comfortable with planning. But the idea here is the get a really solid basic plan down so you can be honest about your schedule and get the best stuff on the day. When you are actually shooting, you, as the director, should be totally absorbed in getting the best performance from the actors. You don't want to have to worry too much about shot planning etc.


When you are working cheap like this the main problem is getting the commitments you need from the various cast and crew members to "go the distance". That's another reason why planning is so important. You need to be able to tell everyone exactly what the schedule is and how long a commitment you need from them. The shorter the commitment, the better the odds of getting a seasoned cast/crew. If the script is solid enough you might be amazed at the talent you can attract... assuming the commitment isn't too long.

Sunday, April 29, 2007

Put a chicken to sleep

I know of a method for "hypnotising" chickens. You do it like this:


But this trick for "putting a chicken to sleep was new to me:

Friday, April 20, 2007

Chicken 2.0

As of April 18th I accomplished my second goal for for my chicken project. I bred chickens that I hatched from eggs (first goal) then bred and hatched the eggs from those chickens (second goal). The dam is definitely Dutches and I'm almost certain the sire of most of them is Black Beard. But it's impossible to say for sure since all three chickens, Dutches, Samson and Black Beard, were penned together. One thing is certain, any chick with tufts must be Black Beards since they can only get tufts from a tufted parent.

Things went amazingly well in the hatch. Every single one of the 10 eggs I put in the incubator hatched. 5 of the 10 chicks have tufts. Based on regular Araucana hatch statistics and taking into account the "lethal" nature of the tufts gene, my results are nothing short of miraculous. ( It's considered "normal" for 25% of an Araucana hatch to die in the shell.) They all seem to be doing pretty well now on day two also. With any luck most of them will grow up OK.

In addition to the Araucanas that I hatched from my own eggs, I acquired some "Araucana" pullets from the feed store. They are actually some type of Easter-Egg chicken. I purchased them since I wasn't sure I would be able to get any of my eggs to hatch and I wanted more hens. Now they are somewhat redundant but at least they'll add a little color to the yard.


Here is a close up of one of the new Araucana chicks.
I use the highly advanced cardboard-box-and-hand-me-down-lamp brooding method. Yeah. Only finest for my chicks.

You can see a movie of the chicks in action here: http://www.mediamax.com/lordtangent/Hosted/Chicks_2.0_day_old.MOV

I'm hatching another couple of batches before getting rid of my adult roosters. I'll decide if I want to do another generation later and figure out what to do for roosters at that point.

Wednesday, April 11, 2007

My RAW Workflow

Since I "Edit" 100% of my final photos in one way or another anyway, RAW workflow doesn't add much hassle to things. At the very least I color grade the images. (Either making them "accurate" or not accurate... it's a creative choice) I use Photoshop "Adobe Camera RAW" loader.

Some people are critical of the quality of the CS2 RAW loader . I find it good enough for my uses. And the convenience of doing everything in one place outweighs any minor quality differences there might be.

JPEG / 8 bit doesn't have the bandwidth for slamming the color around too much so I usually work in 16 bit from the RAW files. "16 bits" really isn't as "accurate" as you might think simply because of how the linear output of the sensor is mapped up to your gamma corrected working color space / display. But it does carry a little extra data that would otherwise get thrown out. It's nice to hang on to that as long as possible. One good thing about working in larger color spaces like ProPhoto RGB is that less of the data is likely to be "rounded out" of even the 16 bits. Keep reading and it might start to make some sense... or none at all.

Here is break down of my process.

0. When shooting, "Expose to the right"
1. Copy RAWs to the computer on a card reader
2. Open RAW in CS2 RAW loader as 16bits/channel, ProPhoto RGB color space (it is the widest gamut color space that ships with Photoshop)
a. While in ACR (Adobe Camera RAW) I do the basic white balance and if required (as is usually the case when exposing to the right) exposure compensation.
3. Image is now in CS2
4. Edit image as required (Still in 16bits/channel, ProPhoto RGB)
5. After image editing is done I direct the output images as required.
a. Save a Photoshop format image with all data if required for later editing
b. CONVERT to sRGB THEN 8 bits per channel for web / modeles proofs
c. Convert to AdobeRGB or CMYK as per printers requirements (for print) You can leave it at 16 bits if you want. Or not. It depends on the printers pref.

The important thing to remember when working in a more advanced color space like ProPhoto is to make sure you re-map it to something usable by the target audience. The ProPhoto color space wont render correctly on 99% of most image viewers because they have no concept of color spaces. Also, 16Bits/Channel is complete overkill for almost all displays. You only need it as a working space to help reduce rounding error. And, depending on your camera, exposure, etc. the signal to noise is WAY worse the precision of 16bits anyway. You are sampling "noise" for no reason. You keep the extra bit depth around as long as possible mostly for the benefits to image processing. (less rounding error) And the slight improvement in capturing actual precision from the RAW file it gives. (There is some signal buried in that noise after all) It's often ok to throw out the extra bits once you are done with your editing. But not until you are done. It's a one way street. There is not much point in promoting 8 bit images to 16 bit because the precision is already gone.

Basically, I try to do all editing in 16bits/channel, ProPhotoRGB and only convert to the smaller gamut / bit depth as the very last step.

There you have it. All my secrets.

Saturday, January 06, 2007

Running Lightwave Screamernet ( lwsn ) under Wine on Linux

Executive summary:
Yes, it is possible to run lwsn.exe (v9) under the influence of Wine. Even multithreading works! Running lwsn.exe in "-3" (batch mode) is pretty trivial, which means it would be possible to control it with most Linux render queues.


Forward:
Recently I've been doing a bit of R&D on the possibility of running Lightwaves network renderer Screamernet ( lwsn.exe ) under Linux. While Googling around to try to find some pointers I found several people claiming to have had success but no real "How-Tos" explaining how to actually do it. These are my notes to myself. Maybe you'll find them useful as well.


How-To:

The basics...

1. First of all, you need to install Wine and get it configured. This isn't a Wine How-To, so you are mostly on your own in that department. Fear not! Wine is easy to set up. I have one tip for you: winecfg

winecfg is a GUI that makes setting up Wine trivial. You can use winecfg to easily create "fake" drive letters like C:, etc. It's also possible to create fake drive letters for network mounted Linux volumes, similar to the way one can map network shares in Windows to a drive letter. For my examples, I'll be using the C: drive, which Winetools sets up under ~USERNAME/.wine/drive_c/

Another tool you might consider is Winetools. It has a few extra functions that might come in handy once you have Wine setup. Like doing "virtual reboots" of Windows.


2. Once you have Wine installed and some fake drive letters created, it's time to install Lightwave. Lightwave keeps all it's configuration info in plain text files stored under the users directory in the "C:\Documents and Settings\Default User". That's just the default path. LW has a command line switch that allows you to point it to any config dir. As a result, it's possible to copy the LW install dir and config dir anywhere as long as the config files are updated to reflect the new paths to the plug-ins and LW is pointed to the correct config dir.


You only need these parts of your LW install for for LWSN to work:
c:\LightWave\Plugins\
c:\LightWave\Plugins\Programs\


Create a temporary staging DIR on your hard drive and copy all the required parts of LW to it being careful to not mess up the paths.


c:\tmp\LightwaveStagingArea\
c:\tmp\LightwaveStagingArea\LightWave\Plugins\
c:\tmp\LightwaveStagingArea\LightWave\Plugins\Programs\


It also makes sense to create a DIR for the configs under your intended Lightwave install dir and copy the configs there:


c:\tmp\LightwaveStagingArea\LightWave\config\


At this point, you might want to clean things up the and remove other things lwsn doesn't really need from your staging area. The Presets under the Programs DIR are a good example. Screamernet doesn't need those. You might have some other junk you recognise lwsn wont need. This step isn't required, but it will save some space and reduce clutter.

Now Zip up everything in you your staging area being careful not to mess up the paths.

Get that archive over to your Linux box in whatever way makes most sense to you and expand it under your "virtual" C: drive.

TIP: It's important to understand that the paths to all the plug-ins are hard coded in the LWconfig files. If you copy your LW to a "virtual path" under Wine that disagrees with the config, LW wont work. You'll either need to go though the config files and "find and replace" the paths to fix them, or just make sure you copy LW to the same path under Wine as what you are using in Windows. For testing, the easiest thing to do is just make a fake drive and install path under Wine that mirrors your Windows setup. (This will be C:\Program Files\LightWave\ and ~$USERNAME/.wine/drive_c/Program Files/Lightwave/ for most people)

3. Using the above simple case of basically copying LW from C: to Wines "virtual" C: drive, you should now have a working LW on your Linux machine. Here is an example of how you invoke lwsn.exe in "-3" (batch) mode.

wine "C:\LightWave9\Programs\lwsn.exe" -3 -q -c"C:\LightWave9\config" -d"C:\LightWave9\test_content" "C:\LightWave9\test_content\scenes\test_scene.lws" 1 10 1

Wow. That looks pretty overwhelming. Let's examine each part. You'll see it's not so complex. First of all, the quotes help us escape the back slashes. If you are familiar to Linux, you know \ IS the escape character. You can escape back slashes by using a SECOND back slash like so \\. I personally prefer to just use quotes :


wine "C:\LightWave9\Programs\lwsn.exe" -3 -q <--- This is the command -3 puts lwsn in batch mode -q reduces it's verbosity -c"C:\LightWave9\config" -c <--- points lwsn.exe to the config dir -d"C:\LightWave9\test_content" -d <--- points lwsn.exe to the content "C:\LightWave9\test_content\scenes\test_scene.lws" 1 10 1 <--- the last argument is the scene FIRST LAST and STEP Details... During my tests, I noticed that LW and/or Wine dumped some junk error messages out to the console. They did not seem fatal. Everything rendered just fine. But the errors were repetative and annoying. The error messages can be safely redirected to /dev/null , but keep in mind that by doing this you might potentially loose any genuine error messages in the bargain. In my experience, when lwsn DOES fail it does so silently anyway. Redirecting the error output will probably never be a problem. Redirecting stderr (Standard Error) to the "no where" dustbin "null" is done like this in Unix/Linux: [command] 2> /dev/null
So, just add that to the end of your command string to suppress those errors.

Another issue is that Wine wants Xwindows to be running (even though it never actually opens any windows) when lwsn is invoked. This can be a problem if you try to run lwsn on a headless machine (not running X) or on virtual console where the DISPLAY variable isn't defined. It's easy to set DISPLAY for a single invocation of lwsn, or you can set it for the entire console session with setenv. The advantage of making Wine use a remote Xserver is the ram saved by not running any Xserver at all on the rendering machine. But if that's not an option you can always just right X with a really basic Windows Manager or even no WM to keep things light weight.

To redirect X to 0.0 on a remote machine at 192.168.1.10

setenv DISPLAY 192.168.1.10:0.0

or, if you have a name server or entry in your hosts file, you can do the remote machine by name:

setenv DISPLAY giggles:0.0

It's handy to just define the DISPLAY variable right on the same line that you invoke Wine and lwsn with.

redirect for a single invocation like this:

# DISPLAY=fishbait:0.0 [lwsn_command_string_here]
# DISPLAY=192.168.1.13:0.0 [lwsn_command_string_here]

If wine complains that it can't find a local Xserver you KNOW is running, you might need to define DISPLAY for it just to get it to run locally. I had this problem when I attempted to run lwsn on a virtual console. Just set the DISPLAY variable to the local display like so:


# DISPLAY=0.0 [lwsn_command_string_here]


that's all for now!

Wednesday, November 08, 2006

Hindustan Motors Limited Ambassador

My first taxi ride in India was in a Hindustan Motors Limited Ambassador. The Ambassador is based on a late fifties era British car called the Morris Oxford Series III. HML has been shipping the car with very little (external) changes since 1958. As a result, the highly iconic Ambassador is widely considered The Definitive Indian Car. HML still sells many new Ambassadors even to this day and there are many older Ambasadors providing reliable service to thier owners.

Ambassadors are built like tanks. Considering their track record, and the incremental improvements made over the years it would probably be pretty safe to say that they are the most "Indianized" cars on the market. India may be developing rapidly, but the fact still remains that there are still plenty of rugged areas that can put harsh demands on a car. Even today the Ambassador seems to be one of the best suited cars for many parts of India.

While I toured India, I road in a newer Tata Indica. It was serviceable, but I had the impression at many times that it was rapidly being worn-out and beaten down by the Indian roads. The Indica is more like a Japanese car. Sure, it's more modern in design, but it also seemed light weight and somewhat weaker than an Ambassador as a result. The drivers I spoke to had mixed opinions on the newer cars vs. the Ambassador. They all had a lot of respect for the Ambassador, though.

Wikipedia Link

Tuesday, November 07, 2006

Travel Tips

After de-constructing the way I traveled in India and looking at the various trade-offs I made, I've come up with a few suggestions. I'm sure none of this stuff will be news to experienced travelers. But it might save un-experienced travelers a little grief.

The trick when traveling in India is to find a good middle-ground between Adventure and Comfort. On the one hand, it's quite possible on a western budget, to travel and eat like a king. But then you don't really interact with any "real" Indians or see anything. Of course, the other extreme, which would be to travel and eat like an average Indian, is not such a good idea. (packed buses and trains. bed-bugs, cholera, and dysentery, anyone?) In my opinion, the best is somewhere in the middle. The entire spectrum of experience is available. How do you want to travel?

suggestions to maximize your travel options:

1. Pack Light. Try to fit everything in one bag, preferably a big back pack. Bring a flash light!
2. Give yourself plenty of time. Time is more valuable than money when traveling in India.
a) Try to be as cheap as possible if you have the time. Make you money go as far as possible.
3. Be adventurous. (but not stupid)

It's pointless to bring too many cloths to India. If you need more stuff you can get really nice cloths there for cheaper than what they cost at home. Don't even bother packing socks unless you are going to be someplace cold. (you wont need them)

I didn't follow the "pack light" rule, and I think it cost me some options. I took a Digital SLR and a fairly large kit of lenses. I took too many cloths. Next time, if I take an SLR at all, (It will be tough for me to resist) I will only take one lens. My camera kit was my second piece of luggage and in my opinion "stressing" over it diminished my freedom of movement. My first piece of luggage was also pretty bulky. That didn't help either. Next time, I will take far fewer cloths.

My flashlight was my most valuable piece of luggage short of my shorts. (I mean, undies) I highly recommend an LED headlamp. They are compact and leave your hands free when you put them on your head. My headlight is a cheapy I got at the supermarket, not the sporting goods store type, which are much more expensive. The cheap headlight works just fine. Where I was staying the power outages were frequent enough that a flash light of some sort was a must. But even in more developed areas of India a light will come in handy.

When you pack light, it's easier to take public transportation without stressing about your "stuff". If you keep a SMALL bag of your valuable stuff (camera, phone, etc.) with you, the only thing in your bigger bag is your cloths.

By being Adventurous, I mean, traveling via public transportation and not being afraid to do a little walking. I'm sad to admit that this is something I never actually did while I was in India. I only ever rode in Taxis and Auto-Rickshaws. The rest of the time I drove a rental motor bike. If you give yourself time you can save a lot of cash by riding on the bus or train. Very nice air conditioned "luxury" bus rides are available. You don't need to ride in the super packed "cheap" bus. Ride a taxi or rickshaw from the bus stand to your final destination.

Speaking of rickshaws... you need to be careful of those guys. Actually, taxi drivers as well. Even though technically the business is regulated they try to get away with all sorts of B.S.. Make sure you get a commitment on the price up front, and don't let them yank you around by taking you to gift shops, etc.

It's possible to find very cheap accommodations in India. 3 star hotels and up cost a little less than what you'd expect to pay in the USA. ($25-35) But "guest houses" and hostels are much cheaper, about $5-15 a night. You could probably find even cheaper places to stay, but you might be taking your chances with the bed-bugs.

Monday, November 06, 2006

Home

I'm home now. My little sister managed to not burn down my house or kill any of my chickens. In fact, she actually spiffed the place up while I was away.

The flights home were murder. I' was in the air for like 24 hours. Fortunately, I was able to nap though parts of the trip. I usually don't sleep so well on airplanes. But in this case the flights were so long there really wasn't any choice.

Now that I'm home I feel a sort of home sickness. It's like reverse-home-sickness. Auroville was starting to feel like home. I assume this sort of thing is normal, and it will pass. I mean, California is a damn nice place to live, so why would I miss India?

I've had some many experiences over the last couple of months, it's going to take me a couple of MORE months just to integrate them into myself. One of my friends said to me yesterday "I've heard that going to India changes people." I have to agree. It will be difficult for me to ever look at things the same way.

While I was India I met several ex-patriot Americans and many other western ex-pats. All of them love India (and/or Auroville. Many of them are Auroville lovers) I was able to get the "inside scoop" on living in India as an ex-pat. Interesting stuff. As I've said, I have a lot to think about. But right now I must admit that I believe I'll be going back to India again. If not to stay, at least for another long visit. There is just too much to see there for one visit to be enough. There are other places I want to see first though, so India will probably need to wait for a while.

Friday, November 03, 2006

Heading Home

Today is my last day in India and Auroville. I just got news that my dad was admitted to the hospital yesterday complaining of pain shooting up his neck and jaw. At first it was believed that he'd suffered a minor heart attack but after the doctors checked out his condition it turned out it was "just" a partially blocked artery. Actually, my dad is quite lucky. It COULD have lead to a heart attack if he hadn't gone in to the doctor and done something about it. (My dad is a hypochondriac, so that would have been highly unlikely... there are people that ignore that sort of thing, though) The doctors scheduled him for surgery and installed a stint to open up the artery. My dad is now stable and scheduled for release from the ICU today.

All I can think about now is how much it would have sucked if my dad had died while I was on the other side of the world... and only about two weeks from when I was to see him and most of the rest of my family at my brothers upcoming wedding. WOW. What a close call.

Friday, October 27, 2006

Future School

Today I did a presentation on feature animation to the students at the Future School. Future school? you say. What the heck is Future School? Well, here in Auroville, they have some specific ideas about education. "The Mother" was very clear about what she considered the ideal in education: No grades, no tests, etc. Many people here take that stuff very seriously. So, the Mothers Will, it was. As a result, the first school here is actually called Last School, as in, it is a last school you'll ever need. (You are then expected to teach yourself). The former school here for high school aged kids is called Transition School. It's a place where students can direct their own education. Things are not very structured there. Unfortunately, it also does not provide any kind of certification for students who want to go on to university, etc. As a result, many kids were leaving Auroville for private schooling around age 13. ( or just slacking at Transition school. ) A couple of Aurovillians recognized the need for something new since the Future School / Transition School experiment didn't seem to be working. Future School was born.

At Future School, students can earn "O" and "A" levels in what is a more structured environment compared to Transition School. Compared to any regular western school the environment is extremely flexible, though.

The first thing I learned about Future school that blew my mind was the teacher student ratio. There are 54 students and something like 32 teachers. As a result many courses are more like tutoring sessions than "classes". The school also promotes a mentoring program where students may pick a mentor to help guide them.

OK, enough about the school. How did the presentation go? I would say quite well. The students were attentive and thoughtful in their questions. I managed to cover the concepts of pre-production and the various steps of production in 3D animation. I even had time to talk about the steps of "traditional" (i.e. hand drawn 2D) animation for some students that showed interest. At the end I covered the various paths one could take to get into the business. (There are many!) I also made sure to tall the kids how lucky they are to have such an awesome school. I really wish I could have gone to a high school like Future School. It's more like having a team of personal tutors than a regular school. How could any even semi-motivated student go wrong in such an environment?

Wednesday, October 25, 2006

Bin-O-Media

I've been storing my movies at a site called Media Max. The idea was to link them directly from my blog posts, but out of sheer laziness, I haven't been keeping up. There are quite a few now.

If you want to see the movies you can go right to the bin-O-media:

http://www.mediamax.com/lordtangent/Hosted/

Also, don't forget that you can click on all the images on the blog to get a bigger view!

Saturday, October 21, 2006

Diwalli

I'm back in Auroville. Michael was about to leave for AV himself, so he caught a ride with me.

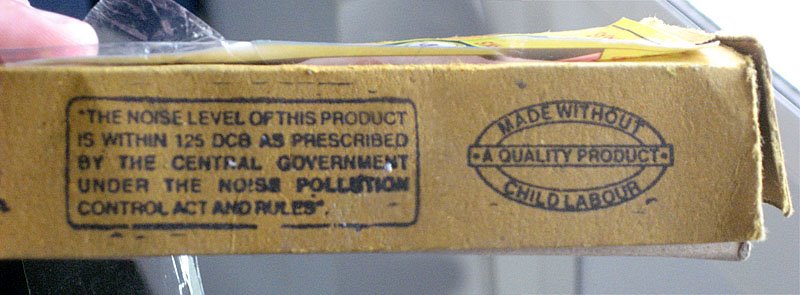
Today is Diwalli (Dee-val-ee). It's a huge holiday here. Like Christmas in the USA. People give gifts and employers give an annual bonus, usually equal to two months pay. Oh yeah... and there are fireworks! Fireworks in India are insane. Technically, there seems to be a limit to how large a fire-cracker can be. But it's based on noise pollution laws, not any sort of energy, powder charge, or anything like that. The "M80" or "Cherry Bomb" type devices are known by the name "A-Bomb" or "H-Bomb" here, if that is any indication of how powerful they are. They are hand-blower-offers, if I have ever seen one. "Two Inch" firecrackers are still available here as well. (IMHO, two inch fire crackers are the only proper fire cracker to begin with... unfortunately, they are considered too dangerous in the States.) Of course, I could not resist participating in the festivities! On the way back to AV we stopped at one of the numerous fireworks stands and picked up some stuff. I didn't go for any of the sparkly stuff. Only things that explode. My only photographic proof is a single movie shot by Michael of some of the crackers going off. Excuse the shakiness. He said the first cracker scared him so much he flinched. The sound on the video can't do the sound of these things justice. They are vastly more loud than the wimpy crackers in the USA. I also set off a few "A-Bombs". There is no video because Michael was too busy covering his ears to shoot a movie! (They are freaking loud)

The particular type of A-Bomb I got was called the "King of King" and for what ever reason features Bruce Lee on the cover:


Along with the obvious Hindu inspired names and images for certain fireworks i.e. Lakshmi Bombs, Vishnu, etc, I noticed surprising number of the boxes featured male and (mostly) female western actors. I doubt the images were licensed. Anyway, it was really weird. I mean, what do Britney Speers and Sarah Michelle Geller have to do with Diwalli?

In the evening the people at Mitra, the hostel where I'm now staying, also set off some rockets and sparkly fireworks.

Overall, the quality of Indian fireworks is less than that of the Chinese fireworks we typically get in the USA. For example, not a single one of the rockets we fired off at Mitra functioned close to the same. One even exploded after only flying up about 6 feet. There were tons of duds and "fizzlers" in the strings of crackers and the A-Bombs I set off were all different in power. (None of them were "weak" but some of them were frighteningly more powerful than the rest!) One of them dudded out... what do you do with a dud A-Bomb? I just moved my whole "stage" area to a different place. There was no way I was getting close to that thing!


All the fireworks felt like a celebration of my return to Auroville. I haven't had that much fun with fireworks since I was a pre-teen.


As far as my new accommodations, I have to say that Mitra is pretty great. 110 Rupees per day and you get "breakfast" (Which really is nothing but whole wheat bread and tea) and Dinner. OK. SO the food isn't great. But you gotta keep in mind that 110 Rupees is like $2.50 a day. The accommodations are basic. A room and a shared bath/lav. But it's clean and the rooms are nice. I lucked out and I'm sharing what would normally be a dorm room for 6 people with just one other person (Michael). We have tons of space. It's great.

Thursday, October 19, 2006

Bangalore

Today (after a pretty brutal day of driving) I'm in Bangalore. Bangalore is like Los Angeles on steroids (or maybe crack?) Imagine all the same problems LA has and then multiply them by 10. Crappy traffic, bad air, poor public transportation, homelessness...etc. The developed areas of the city are good. That's is, they have side walks, the buildings are fairly well built (well, they look good at least) and the infrastructure (other than the roads) seems OK. But one thing the city clearly isn't ready for is the recent explosion in car ownership. From what people have told me cars are a totally new thing. Individuals owning cars only just started in the last 5 years or so. Bangalore (and other big cities) are buckling under the pressure of all the new traffic. I got to experience it first hand when I went to visit my new friend Michael's orphanage, Children's Project. On the way there, it took us over an hour and a half to go about 20km. As it turns out, that was making good time. It took us over two and a half hours to get back to the hotel! (during rush hour)

Pretty much grid-locked. Even the motorcycles can't move:


You'd think that they would have learned from the experiences of other developed cities. Why not plan for and install public transportation before the rest of the city is to mature for it to be easy in install?


My guess is that it's mostly the poverty of the government. They just don't have the resources to make transportation in a developing city. Of course, there are ways that they could easily make developers "pay as they go" for the instillation of city-wide public transportation. (American cities like LA could do the same thing) Or at least purchase the land for future transportation development BEFORE the city is complete, when it's still relatively easy and cheap to do so.


In Bangalore, even the old bus system didn't seem like it was ever quite up to snuff... but now the roads are jammed with cars, three wheelers and motor cycles, even the buses are starting to lose their value. They are jammed up with the cars! Add to that the issue of parking... there is none, anywhere. In this respect, Bangalore is worse than any other city I've ever been in, including Boston. (The silver lining to that is the self limiting nature of the potential car culture that might develop. Like Boston, who will want to drive if parking costs 25 dollars a day!) Then, of course, is the issue of pollution. Between all the two strokes and the terrible old smokey diesels the air is nearly un-breathable. My lungs were sore after one day. I thought Chennai was bad, but Bangalore takes the cake. If they don't do something about the air quality in the cities here they are going to have an explosion of lung disease cases in the coming years.


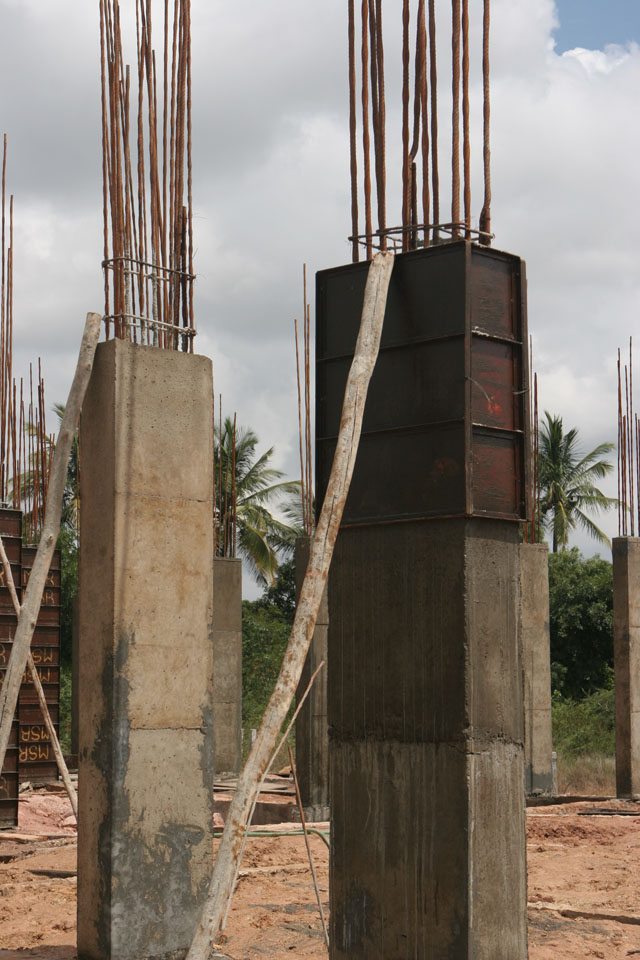
Otherwise, the future is pretty bright. There is clearly a LOT of money pouring into Bangalore. I have never seen so much construction going on all at once in any place I've ever been. It seems like half the buildings are brand new or under construction. Sadly, they are still using the same brain-dead way of building them. No matter how big or small the building it's pretty much always the same: Ferro-cement with brink or cinder-block (i.e. fly ash / concrete blocks) infill. There often seems to be pretty poor or no engineering on the structure. For example, I've seen buildings with WAY more steel than they need. It's a total waste. IN addition, the concrete is still often mixed in small batches and carried up the building by hand. (they have "ready-mix" services here, but many contractors still seem to just use manual labor rather than concrete pumps, etc.) As a result, the concrete is often mixed and layed up completely incorrectly. Here is a photo where you can see where a whole section of concrete has totally failed:
The structure isn't even complete and it's already falling apart. I've also noticed all kinds of really bad workmanship on other under-construction buildings: Not plumb, level , or square masonry; bad bond patterns; incorrectly anchored rebar; etc. In the end, everything is always plastered over with some sort of cement based plaster. Not too many of the mistakes are visible after that. (But the problems are still there). Also the final "finish" of the building often leave much to be desired. For example, they often don't bother to put any plumbing or wiring in the walls or create wet walls. Instead, pipes and conduit can be seen running along the inside and outside walls. It's as if no one ever bothered to put them in the blue-prints. (It isn't universal, but I am seeing a LOT of it)

Often things also seem overbuilt.

I'm no engineer, but this looks like an awful lot of steel.

It LOOKS good, but what's under the skin?


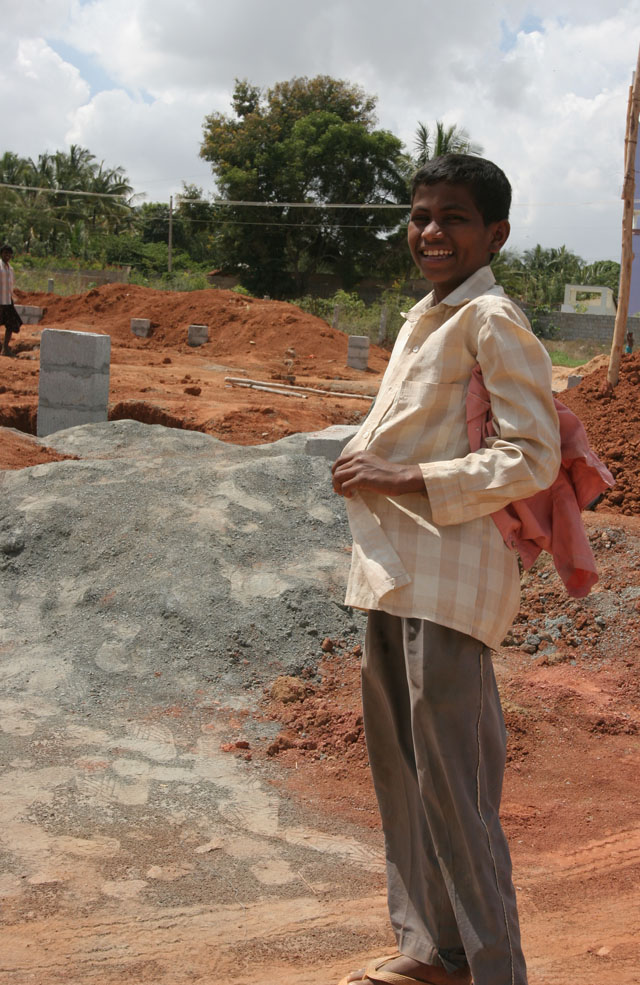
It could be that there is SO MUCH construction going on that contractors can't find any skilled workers. Or, looking at it more pessimistically, maybe it's contractors looking for the cheapest labor regardless of experience. I actually saw a child laborer working on one of the construction sites I walked though. I even got a photograph. (He ASKED me to take his photo) :


My main reason for wanting to visit Bangalore was to see Michael's orphanage. As he warned me, it is a very humble operation. Right now, due to some financial complications, they operate out of a two bedroom condo. I was impressed by the energy of the place regardless. The kids are all angels; very well behaved. And you could feel the genuine love that they have for Micheal, Aleli (his wife) and Rangeeta (Their main teacher and helper). Of course, the adults love them all as well. I took portraits of most of the students. The kids were all so full of happiness, it was quite easy to get good shots. They make me look like a master photographer! It really is hard to share with words the happiness and upbeat attitude of the kids. Considering their backgrounds, it is astounding. Many of them come from the most terrible situations you can imagine. One child, who was only four or five years old, was so neglected by their former guardian that they had scars from skin infections. A few of the kids have been abused sexually and physically. Normally, the prospects for such kids aren't good. Yet after a few years of living in a place where their foster parents provide a safe home, decent care, and plenty of love, it seems that they are well on their way to a bright future. They have the safety to be allowed a proper childhood.


There are so many shots I just combined them into a single sheet. The kids are so radiant, it made my job easy. (Click the link for the image [5MB] .)

http://www.mediamax.com/lordtangent/Hosted/ContactSheet_LARGE.jpg

I met Michael at the earth architecture workshop. His reason for taking the workshop was to learn enough so he could build his new facility. Recently, the Childrens project was lucky enough to acquire some land in Coorg, which is an area in the tea/coffee region. But resources are stretched to the limit, so the money he has to actually build with is limited. They are going to have to make every penny count. He plans to build the structure himself. (But no offer of help will be turned away!) You can see more about the project at childrensproject.org

Tuesday, October 17, 2006

Hampi

Hampi. Where to start. Wow.

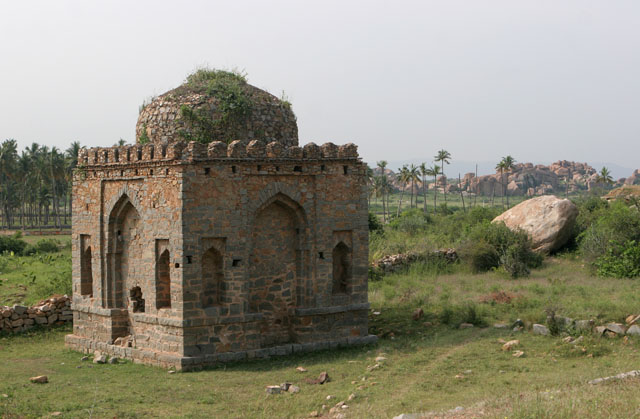
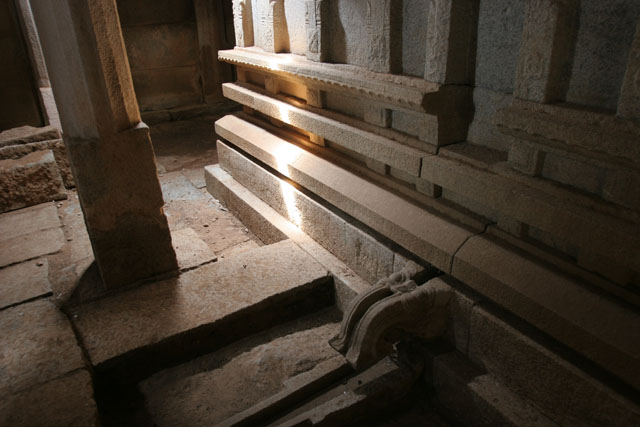
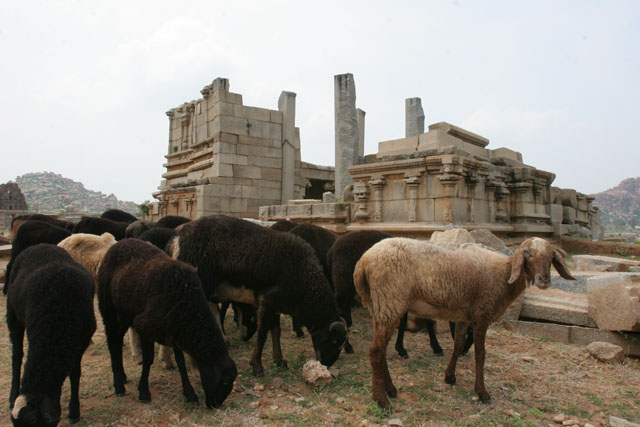
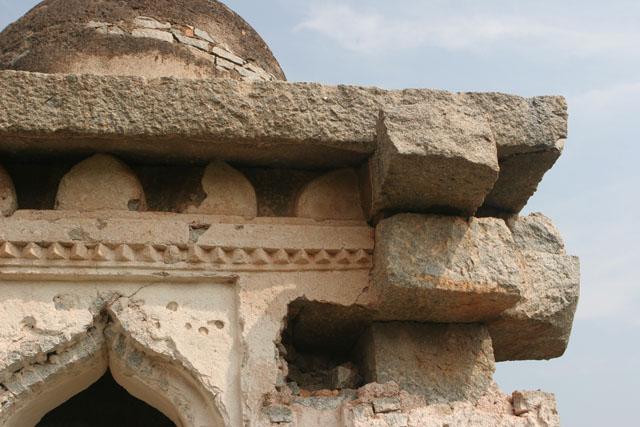
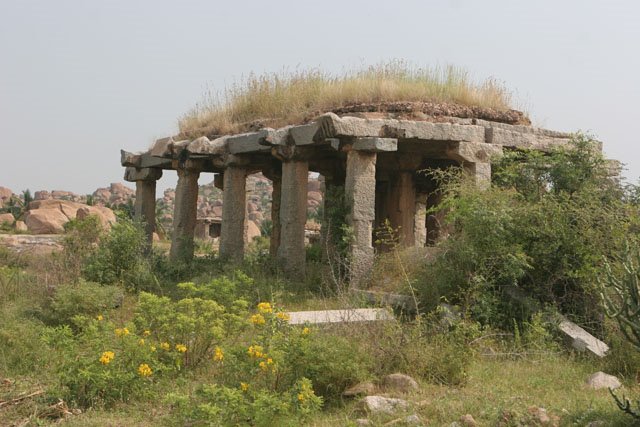
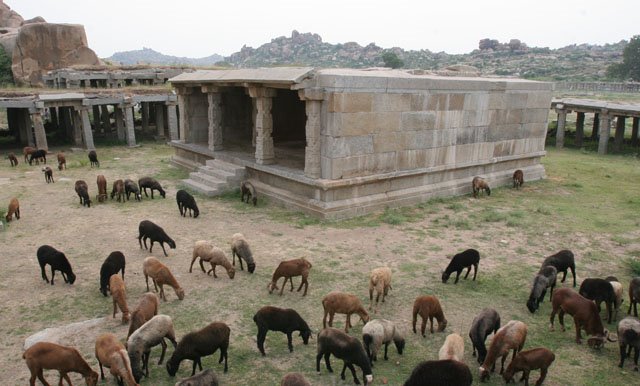
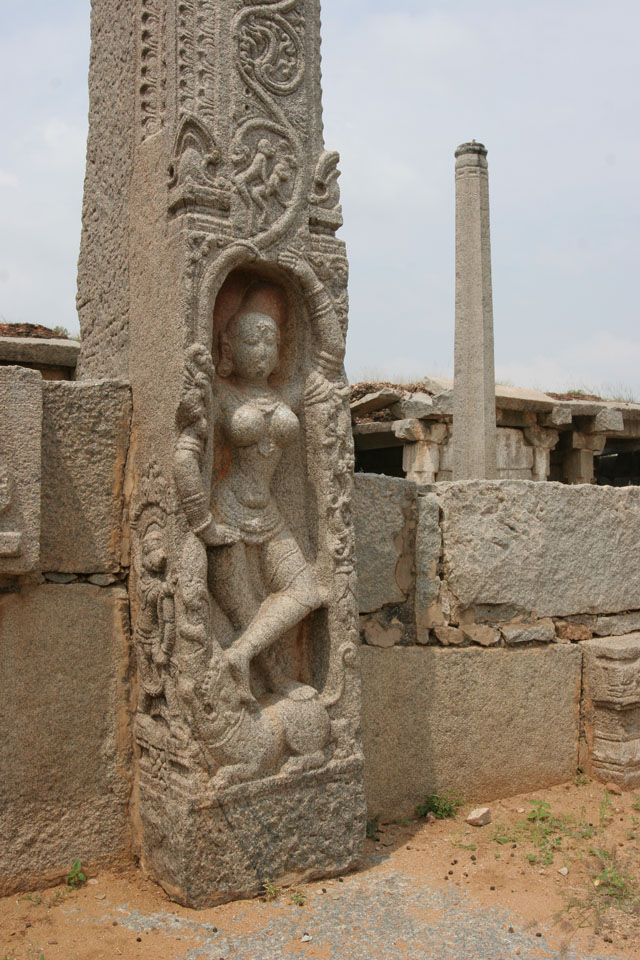
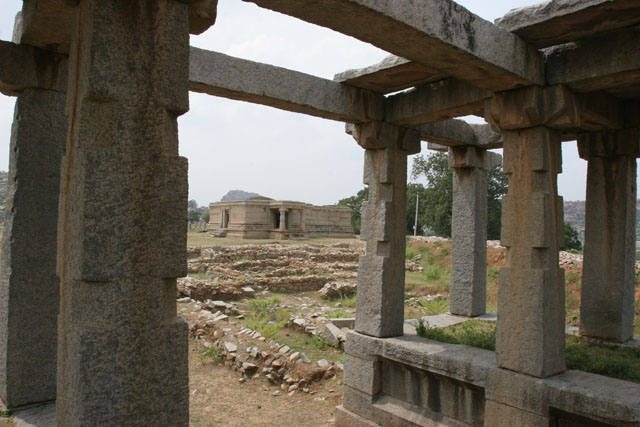
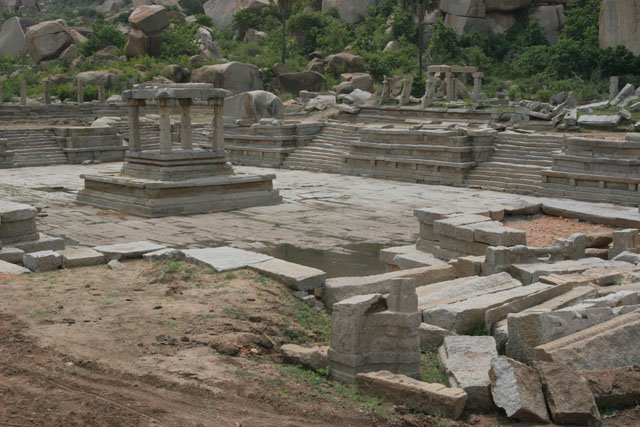
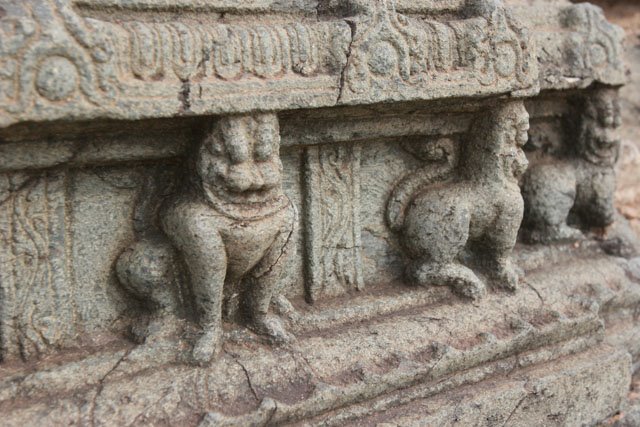
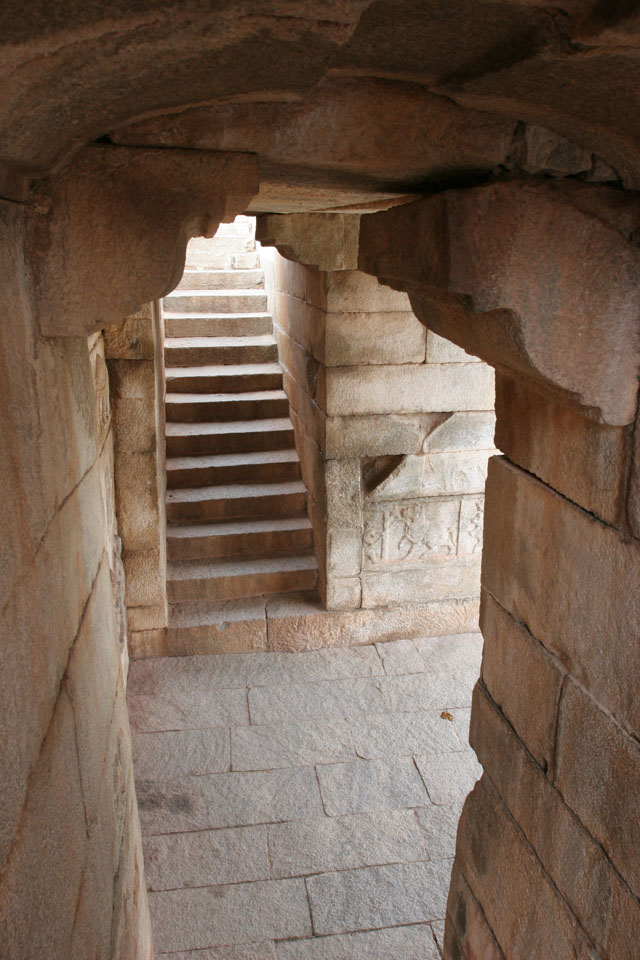
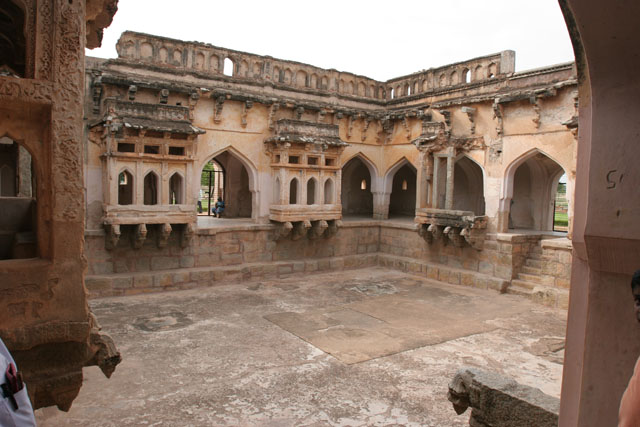
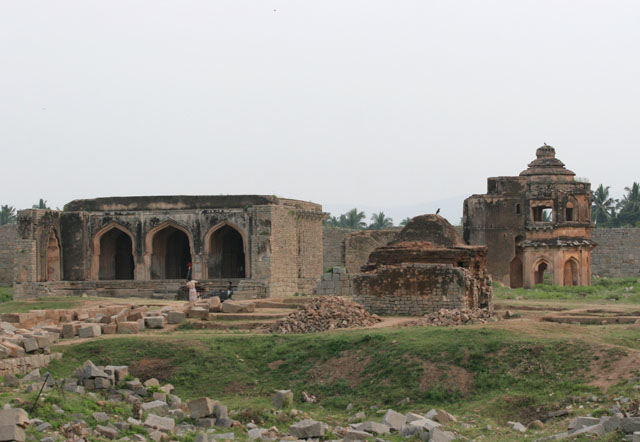
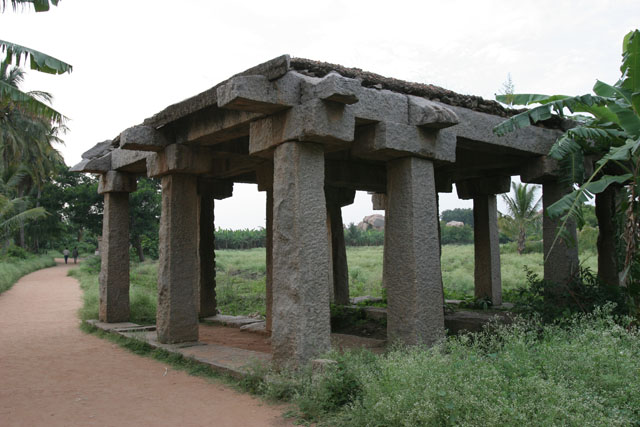
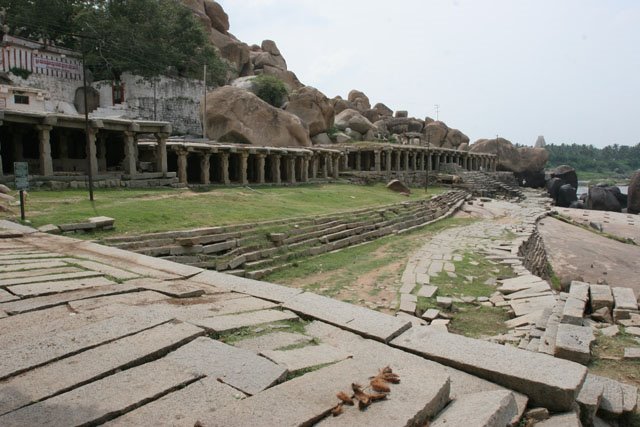
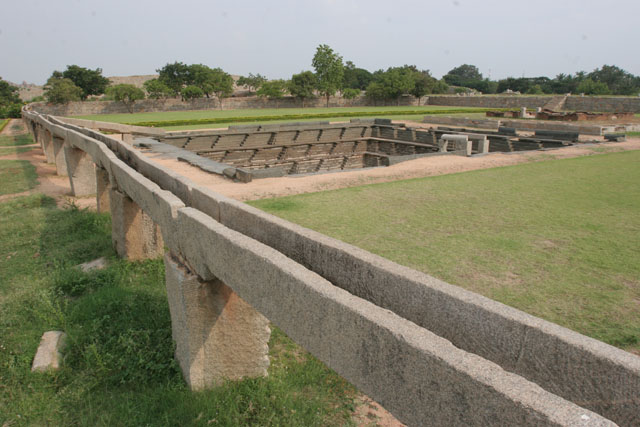
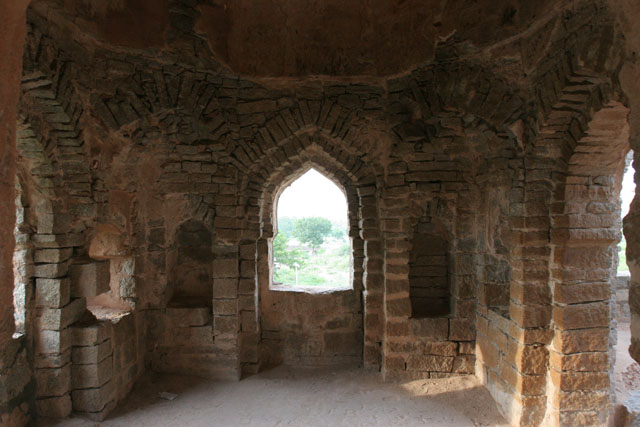
Today I explored Hampi. Hampi is a large archaeological site (i.e., ruins) of a 14-16th century city in South India. The site is huge, about 26km2 One day is definitely not enough to see this site. Sadly, that's all I had. The contemporary historical writing regarding Hampi during it's hay day describe an exceedingly rich city. It is even compared to ancient Rome. For years it was the imperial city of several south Indian kings. It was then attacked, conquered and then systematically looted and destroyed over a four or five year period. It was never re-built and at that point sort of just faded out. As a result, even though there is great damage, Hampi feels like something of a time-capsule. Pottery fragments litter the ground. Some building still even have their plaster. Walking though Hampi it's easy to imagine what it must have been like. Even though the only buildings that remain are the solid stone structures their number is so vast that one cannot realize that it must have been a bustling city. My head was about to explode. Seriously. I mean, like many times during this tour, I was hit by this "I'm touching a thousand year old carving. People used to use this." Of course, in this site nothing is quite a thousand years old, but you get the idea. Hampi is a city. It was a city that for 250 years was comparable to Rome in wealth and sophistication. (Aqueducts, public baths, etc.) It's like you can feel the people who once lived there as you walk though it.

If you are going to tour south India, I highly recommend you see Hampi.


There are clay pot fragments everywhere.


"Queens Tank"


Monday, October 16, 2006

Flat Tire

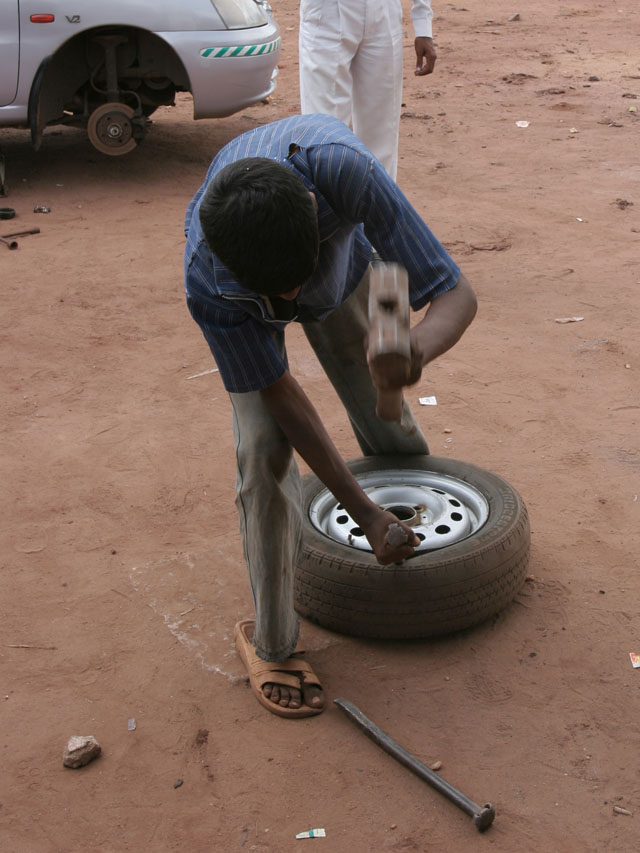
Today we drove. A long way. Over some of the worst roads I've seen so far. I mean, at times the road was basically a dirt road. Actually, a dirt road would have been better. What we ended up driving on much of the time was a half-dirt half-paved road, which is even worse. Along the way one of the tires got punctured. The driver pulled over to a road side tire-fixing-guy-station. It was basically a shack with an air compressor. For whatever reason, it took half an hour to fix the flat even though they had nothing else to do.

The flat-tire-fixing-guy (I would hesitate to call him a mechanic) used a sledge hammer and a couple of crowbars to remove the tire. I guess they've never heard of a manual bead breaker in this part of India.


I was surprised to see an inner-tube in our radial tire until I though about the quality of the roads. It kind of makes sense to use an inner tube in that case. Also, if a sledge hammer and crowbars is the way every shop removes tires, (I've since learned that it is) an inner tube is the only way the tire could ever be expected to hold air...


I finally got a good photo of farmers using traffic to thresh grain. In this case they are processing raggi (sp?) It's a millet like grain. Why buy a threshing machine when there is a constant supply of bus traffic?
A nice ox team.


These guys were moving camels from Rajistan to Bangalor. (He hit me up for fifty bucks just for a photo)


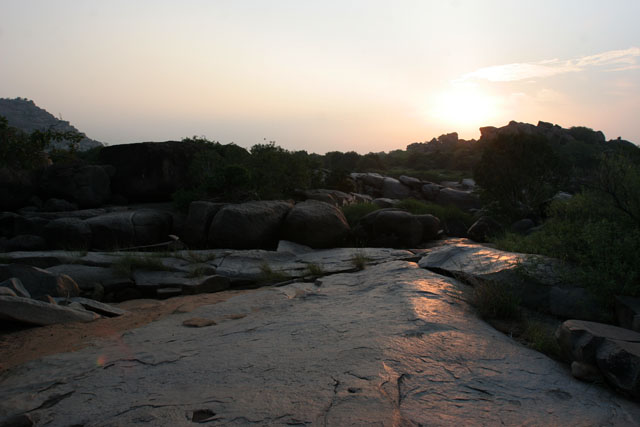
My view from the Boulders Resort outside Hampi.


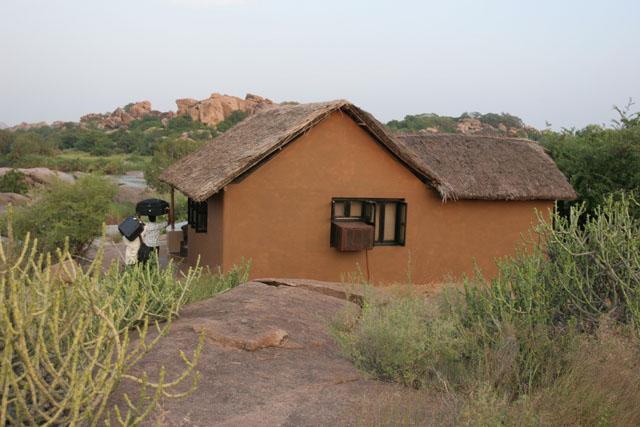
And my cabin:

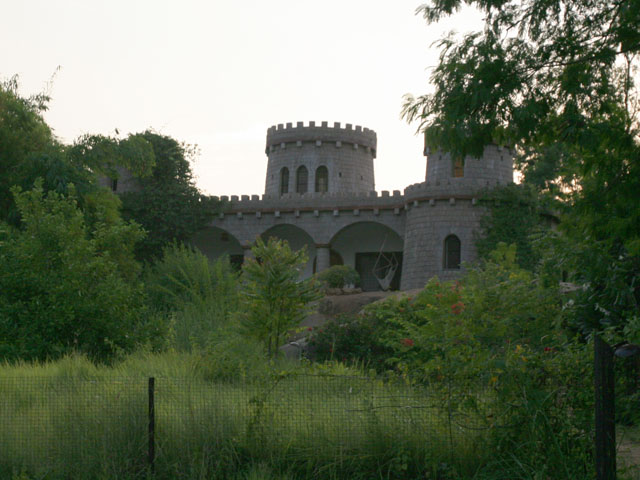
The owners home really is his castle... At least it looks like one.